

Table of Contents
The center support is essential for providing stability to container floors, particularly when the floorboards are installed longitudinally. Its primary role is to support the edges of the floorboards along the middle of the container, ensuring they stay secure and evenly distribute weight. This helps prevent sagging or shifting, maintaining the strength of the floor during loading and transport.
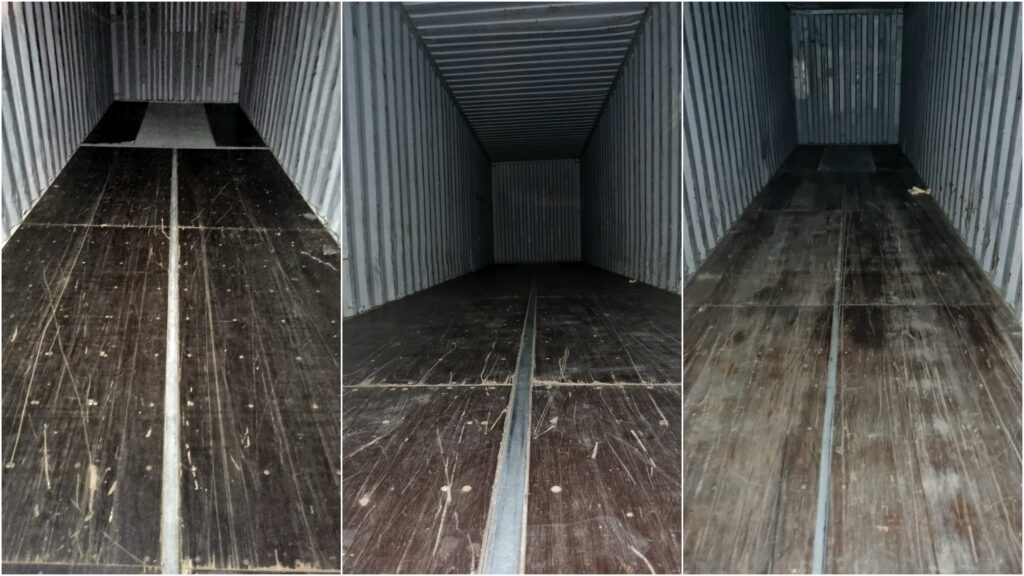
The center support, also known as the center rail or middle support beam.
Two main types of center support profiles
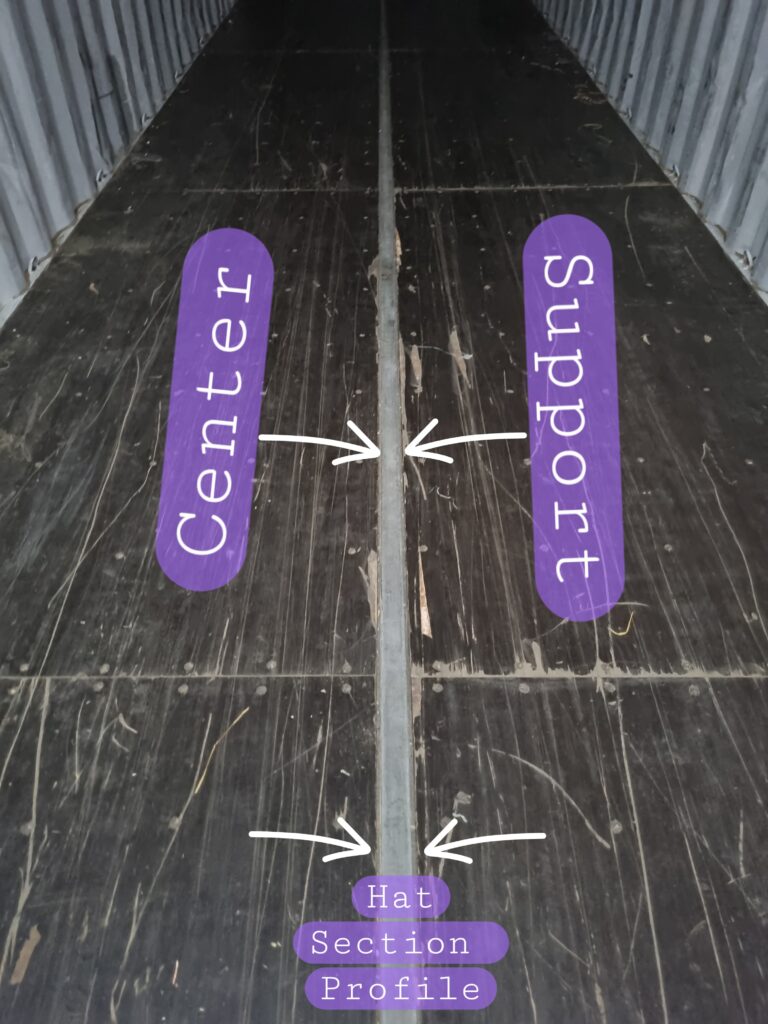
01. Hat-Section Profile
This profile runs along the top of the center support and is shaped like an inverted hat. It holds the edges of the floorboards securely by providing a raised surface. This design strengthens the floor and offers added vertical support to the boards.
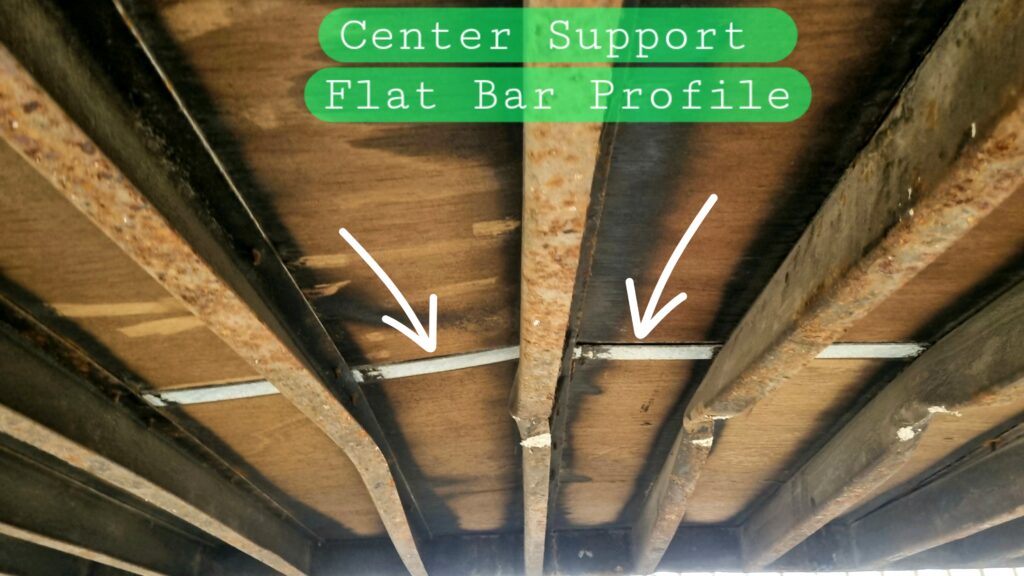
02. Flat-Bar Profile
This profile runs along the bottom of the floorboard edges. It provides a flat surface for the boards to rest on, supporting them from below without adding height like the hat-section. The flat-bar profile is effective for keeping the floor level and evenly distributing weight.
Steps to Install a Center Support for a Partial Floor Replacement
- Measure and Cut the Center Support Plate:
Cut a steel center support plate with the following dimensions:
Thickness: 5 mm (3/16 inch)
Width: 64 mm (2 ½ inches)
The length of the plate should cover the area needed for partial replacement, extending from the damage location towards the container doors or tunnel, depending on where the damage is.
- Remove the Damaged Panel:
For a partial floor replacement, remove the plywood panel where the damage is located. Ensure the rest of the floor is intact.
- Prepare the Understructure:
Remove any existing coatings from the understructure (the area where the center support will be welded).
Grind the center support strip and understructure to ensure the surfaces are smooth and clean, particularly in the areas where welding will take place.
- Position the Center Support:
Place the center support plate along the center line of the container.
Ensure the center support terminates on the flange of a crossmember. This ensures stability and alignment of the support.
- Tack Weld the Center Support:
Tack weld the center support plate into position. This is a temporary weld to hold it in place.
Check the alignment of the center support before proceeding with full welding.
- Skip Weld the Center Support:
Skip weld the underside of the center support strip to the understructure. Skip welding involves welding in sections, leaving gaps between welds to prevent overheating or warping.
- Surface Preparation and Coating:
After welding, prepare the surface of the center support and understructure where the coating was removed during welding.
Prime and top coat the center support and understructure according to the required standards to protect against corrosion.
